
Angular에 Video.js 적용하기
Video.js
Video.js 는 HTML5, CSS, Javascript 을 이용하여 Video Player 제작할 수 있는 영상 오픈 소스 라이브러리입니다.
많은 기업들 (ex: Youtube, Naver 등)에서 사용하고 있는 오픈 소스 라이브러리이고 다양한 플러그인과 쉽게 커스터마이징 할 수 있는 장점을 가지고 있습니다.
회사에서 사용하는 프레임워크인 Angular에 Video.js를 적용하는 과정을 정리하였습니다. (Angular 7+ 기준)
HLS 형식의 영상을 받아와 화질을 변경 할 수 있는 기능을 추가하기 위하여 video.js의 플러그인
- videojs-contrib-quality-levels
- videojs-http-source-selector
을 사용합니다.
설치
기존 Angular 프로젝트에서 video.js를 설치 해줍니다.
npm install --save video.js
npm install --save videojs-contrib-quality-levels
npm install --save videojs-http-source-selector
보통 Angular 프로젝트에서 일반 es5등 자바스크립트 기반의 프로젝트를 사용할 때 Typescript 기반의 Angular에서 사용하기 위하여 제공 되어지는 @types/[프로젝트명] 이 있는 경우가 있고, 없는 경우가 있습니다.
video.js도 마찬가지로 @types/video.js가 존재하지만 이를 적용하고 video.js의 플러그인을 이용 할 경우 기존 video.js만의 기능 이외에 플러그인 적용 등에서 lint 에러가 나면서 작동하지 않았습니다.
따라서, angular.json 파일에 명시적으로 video.js와 플러그인들을 설정 해줍니다.
angular.json
{
      "$schema": "./node_modules/@angular/cli/lib/config/schema.json",
      "version": 1,
      "newProjectRoot": "projects",
      "projects": {
        "app-video-player": {
          "projectType": "application",
          "schematics": {
            "@schematics/angular:component": {
              "style": "scss"
            }
          },
          "root": "",
          "sourceRoot": "src",
          "prefix": "app",
          "architect": {
            "build": {
              "builder": "@angular-devkit/build-angular:browser",
              "options": {
                "outputPath": "dist/app-video-player",
                "index": "src/index.html",
                "main": "src/main.ts",
                "polyfills": "src/polyfills.ts",
                "tsConfig": "tsconfig.app.json",
                "aot": false,
                "assets": [
                  "src/favicon.ico",
                  "src/assets"
                ],
                "styles": [
                  "src/styles.scss",
                  "node_modules/video.js/dist/video-js.min.css",
                  "node_modules/videojs-http-source-selector/dist/videojs-http-source-selector.css"
                ],
                "scripts": [
                  "node_modules/video.js/dist/video.js",
                  "node_modules/videojs-contrib-quality-levels/dist/videojs-contrib-quality-levels.js",
                  "node_modules/videojs-http-source-selector/dist/videojs-http-source-selector.min.js"
                ]
              },
//              ...생략
적용
비디오 플레이어 용 컴포넌트를 생성합니다.
ng generate component video-player
video-player.component.ts
 import {AfterViewInit, Component, Input} from '@angular/core';

    import * as videojs from 'video.js';
    import 'videojs-contrib-quality-levels';
    import 'videojs-http-source-selector';

    @Component({
      selector: 'video-player',
      template: `
        <video id="video-player" class="video-js vjs-big-play-centered" controls crossorigin></video>
      `,
      styles: []
    })
    export class VideoPlayerComponent implements AfterViewInit {
      // 영상 소스 URL을 받아 옴
      @Input() videoURL: string;

      // Video.js 의 기본 값을 세팅 해줍니다.
      public videoJS = videojs.default;
    	// videoPlayer의 타입형을 video.js의 VideoPlayer로 지정합니다.
      private videoPlayer: videojs.VideoJsPlayer;
    	// video.js의 옵션입니다. 해당 컴포넌트에서는 따로 옵션을 추가하지 않았습니다.
    	// 참고 : https://docs.videojs.com/tutorial-options.html
      private options: videojs.VideoJsPlayerOptions;

      ngAfterViewInit(): void {
        this.videoPlayer = this.videoJS('video-player', this.options);
    	  /*
    			HttpSourceSelector 플러그인을 Add 해줍니다. videojs-contrib-quality-levels 와
    			videojs-http-source-selector 를 import 해야합니다. (video.js 플러그인 적용 방법)
    			videojs-contrib-quality-levels는 videojs-http-source-selector가 의존하고 있어서
    			함께 import 했습니다.
    		*/
        this.videoPlayer.httpSourceSelector();
    			// 만약, hls가 아닌 영상이라면 type을 변경하면 됩니다.
        this.videoPlayer.src({
          src: this.videoURL,
          type: 'application/x-mpegURL',
        });
      }
    }
app.component.html
<video-player videoURL="[영상URL]"></video-player>
결과
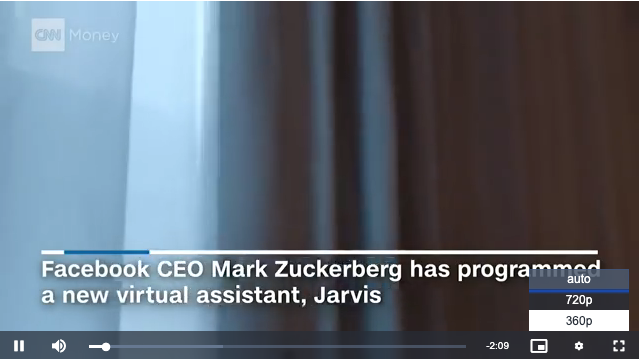
video.js를 이용하여 가장 기본적인 Angular 용 HLS 영상 플레이어를 만들어 보았습니다.
더욱 더 다양한 기능과 디자인의 영상 플레이어를 제작하기 위해선
해당 링크를 참조하실 수 있습니다.
아무래도 Angular는 Typescript를 이용하기 때문에 별도의 커스텀 플레이어 용 프로젝트를 생성하여서 영상 플레이어를 따로 제작하고 Angular 프로젝트에서는 간단한 옵션, 영상 소스 URL 등만 받을 수 있도록 하는 것이 괜찮은 방법이라고 생각됩니다.
포스팅 읽어 주셔서 감사합니다.
댓글남기기